Author Archives: richardhutton

Epilogue

KOD – now it’s time to say goodbye


All good things come to an end. And so do very average things.

It became difficult to maintain this site over the past year; and hardly anybody visits it now, anyway.

So, I’ve decided to create a Twitter account, which I think will be easier to update – although it may take time to get going properly:


https://twitter.com/RHuttonHull


I’m going to keep this blog open, in case any of the content proves helpful to people.

I would like to thank those who have read/commented in the past. Thank you.

Primaris Legion of the Damned (3) – painting black power armour

50 Foot Wave – Dog Days 


I wanted the armour to have a cold tone, so I’ve highlighted it with turquoise and greys:

I’ve left the shoulder pads blank at this stage, as I’m not sure which parts will need highlighting once the flames/chapter icons are in place. 


Paints used:


Base: Abaddon Black + Incubi Darkness (2:1)

Shade: wash recesses with Abaddon Black

Edge highlights: 1) Incubi Darkness 2) Thunder Hawk Blue 3) Administratum Grey 4) Pale Grey Blue

Blink dots: white

Glaze: all over with Nuln Oil + Incubi Darkness + Lahmian medium

I found it necessary to tidy-up around some of the highlighting, using the base-colour of black+Incubi Darkness.

At each highlighting stage, I would recommend completing one area at a time – e.g. an armour plate – before moving onto another. Otherwise all the edge-highlighting becomes a bit demoralising.

Painting this will probably prove a bit stop-start, as I have something else that needs doing – but all will become clear, hopefully.


Primaris Legion of the Damned (2) – painting metal

Taproot – Believed


Just a work in progress post, really – but I thought I would go through painting the metal areas.

I’m trying to improve my technique a bit – and create brighter, cleaner paint schemes than I usually manage.


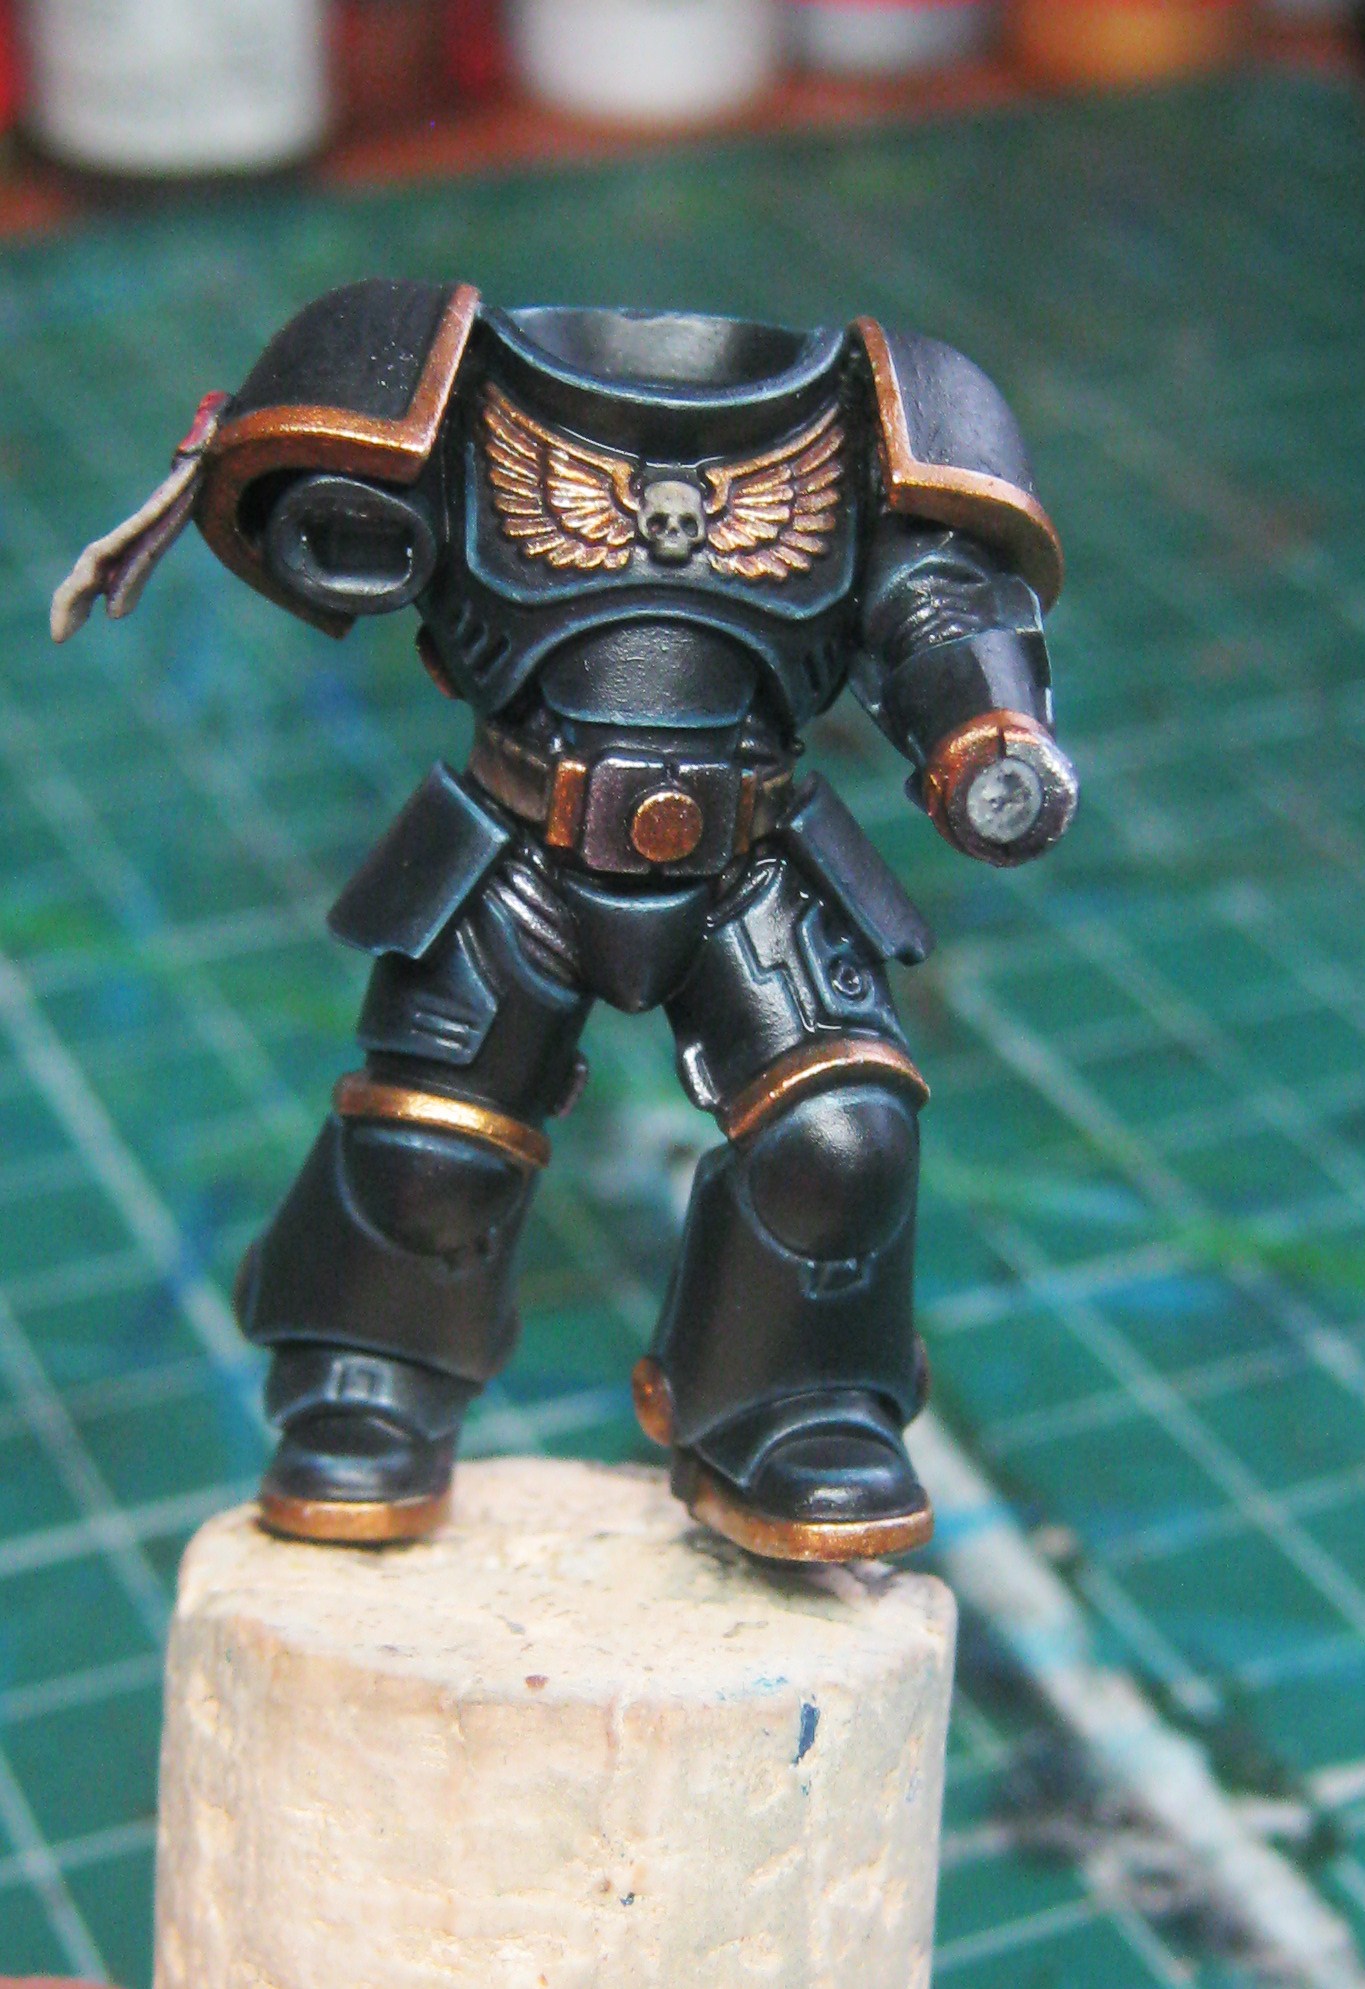
Although Legion of the Damned models tend to be painted with silver trims, I decided to make them gold, as I think it suits the theme of fire and change better.


For painting gold, the paints used:


For the silver areas, paints used:


To shade/glaze both metals, I used:


Painting Silver

Base: Gunmetal

Shade 1: wash all over with several thin layers of Nuln Oil + Abaddon Black. This helps define details, so it reveals where to place highlights.

Shade 2: wash the recesses with Nuln Oil/Abaddon black, then wash all-over with Agrax Earthshade.

Highlight 1: Gunmetal

Highlight 2: Gunmetal + Chainmail

Edge highlight: pure Chainmail – then add Metallic Medium, to highlight corners/points. I then painted blink-dots with pure Metallic Medium.

Glaze: Nuln Oil + Naggaroth Night + Lahmian Medium, all over the silver areas.


Painting Gold

Base: Balthasar Gold

Shade 1: several thin washes of Nuln Oil + Abaddon Black (all over)

Highlight 1: Balthasar Gold + Glorious Gold

Highlight 2: Glorious Gold

Shade 2: wash Seraphim Sepia (all over).

Wash Seraphim Sepia + Rhinox Hide (recesses)

Wash Nuln Oil + Rhinox Hide (deepest recesses)

Edge Highlight 1: Glorious Gold (all over)

Edge Highlight 2: Polished Gold (prominent edges)

Edge Highlight 3: Polished Gold + Metallic Medium (corners/points). As before, add blink-dots with pure metallic medium.

Glaze: Nuln Oil + Naggaroth Night + Lahmian Medium (all over).

I glazed the metals purple in order to give them a slightly sinister hue. You could just use Druchii Violet – but I wanted the colour to be quite dark.

I will make a tutorial for painting ethereal black power armour in the next post, hopefully.

Primaris Legion Of The Damned (1)

The Damned – Smash It Up


In the last post, I said that I would go through what I’m planning to do with the Quaranin model I made last year – but I won’t.

I needed a break from painting miniatures, and I’m not quite ready to start a lengthy project just yet.

So, instead, a short one – a primaris Legion of the Damned marine:


It’s quite a basic conversion, from one of the easybuild models – you can see the parts used:

I will try to make tutorials about painting flames, and the freehand banner, in upcoming posts.

Inquisitor Blacktalon (7) – Finished

Wolf Alice – St Purple & Green 


I’ve finally finished Inquisitor Blacktalon:


It’s a lot brighter and cleaner than the Blanchitsu aesthetic tends to be – but I think that’s okay; as my painting style is usually quite drab, and this was intended to be a step outside my personal comfort-zone.

The main aim for painting this was to practice non-metallic metals – although I definitely haven’t mastered them, I think I have improved.


I was going to continue the Inquisitor warband that I left off last year, in order to paint the Typhus model – but I’ve decided to do something different with the Quaranin figure; which I will go through in the next post.


Inquisitor Blacktalon (6)

The Shop Assistants – Somewhere In China 


Just a work in progress update, as it’s been a while since the last post – and there’s still a bit to go:


I had problems with the sword and the cloak, which is why it’s taken so long to get this far.

I’m also going to rethink the base – as the original idea seems too plain.


Inquisitor Blacktalon (5)

XTC – Love At First Sight 


The non-metallic golds proved as tricky as I expected, which is why it’s taken so long between updates.

I definitely haven’t mastered non-metallic metals – but I think my technique has improved.

I aim to practice intermittently over the upcoming year; and will hopefully be able to put tutorials together, eventually.

These were the paints used for the gold areas:

And for the silver areas:

Non-metallics are much brighter and warmer than true metallic paints, so a few areas need rejigging slightly. I will see if I can go through these in the next post.

Inquisitor Blacktalon (4)

Loof – Sleepy Sheep 


I’ve made a start on the non-metallic areas – beginning with the silver parts:

This is not a technique I’ve had much success with in the past – but I think I have improved; which is the main aim here. 

I also modified the sword blade – oddly enough, glazing it with a bright yellow colour brought out the blue much better than before.

Onto the golden areas – which are quite tricky; if memory serves. The last time I painted non-metallic gold, it tended to look like caramel.

Inquisitor Blacktalon (3)

Wool – Coalinga 


I’ve finished most of the main figure; but I decided to paint the metal parts with non-metallic colours – which is not a method I’ve managed to master, previously.

So, it may take some time to get the gold and silver sections right. I think the sword blade needs adjusting slightly, as well; because the coloration is too subtle.

I wanted the face to look feminine, but quite austere.

I also opted for a blue-grey colour scheme, rather than the pristine white armour I was initially going to paint.

Inquisitor Blacktalon (2)

Taproot – Sumtimes 


I’ve painted the basecoat colours on this model:

I’m going to make the paint scheme a bit brighter and cleaner than I usually do:

And keep the base fairly simple/unadorned, to emphasise the sense of motion:


I think this series of posts will just be work in progress shots, as my health isn’t great at the moment; but if anybody wants specific colour recipes, please feel free to ask.